Internet Explorer
Internet Explorer is not supported. Please upgrade to a more modern browser.
Hey,
this is the first tutorial. I plan on making more as I get into this wonderful project.
My name is Nicolas and I am 20 years old. Currently I study computer science in Frankfurt/Main Germany.
I like to play Minecraft but more over I like to administrate my server and take care of its website. I ran into this
project as I was searching for a new CMS. I installed it on my localhost and startet to play with it.
As there is not much action in this forum I think it might help if I start doing some Tutorials to help new users with
their website.
To start developing on your site you need to do some basic steps to create an solid ground to start with.
At first you should create your own template to work with. To do so you navigate to styles/templates and copy the Default template and
rename the new one to 'myTamplate' as example.
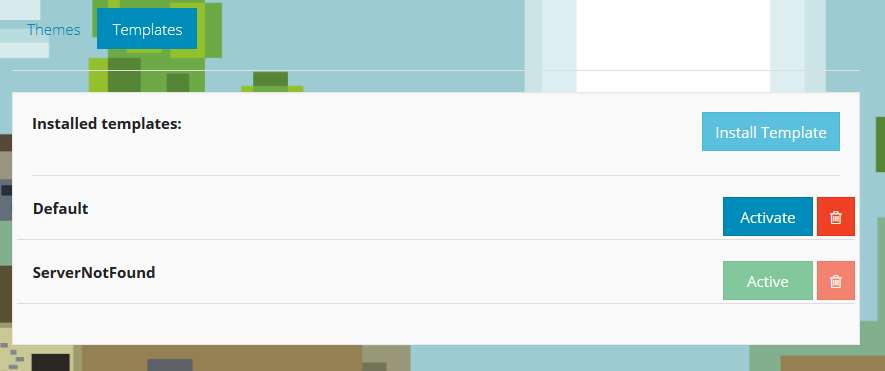
Now that you 'created' your own tamplate you need to install it.
Login to your panel and get into your AdminCP. Navigate to Style and select Templates on the top and
 click on Install Tamplate. Select Scan on the next page. Now you see all available templates.
Just activate your new one and your ready to proceed with the next steps.
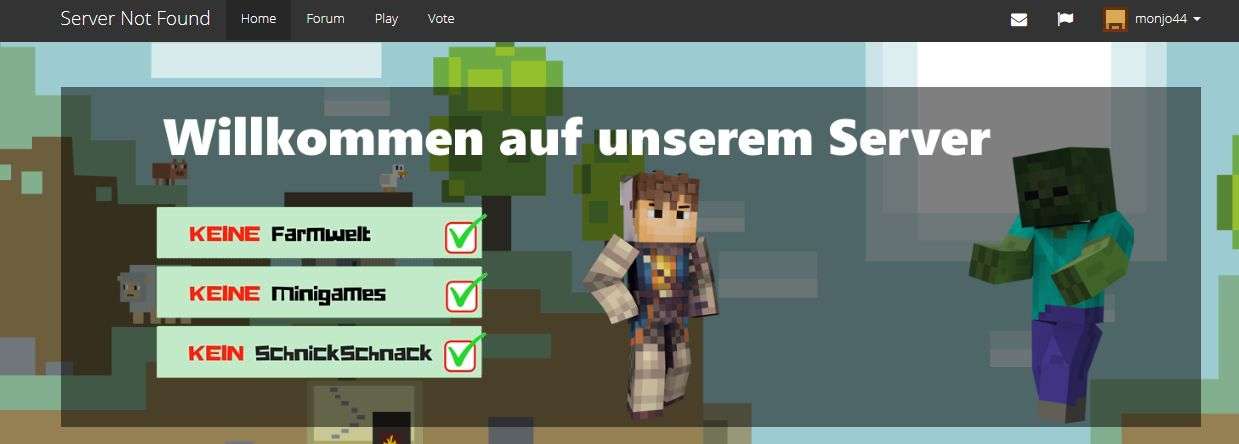
Our goal is to create an image slider on your home page instead of the default banner.
In the end it should look like this:
In this part we need the following files:
styles/templates/yourTamplate/index.tpl //This is the tamplate of your home page.
core/assets/css/custom_css.css //You need to create this file in order to add new css to your tamplate.
core/includes/template/header.php //This file is the tamplate for the part of your website. We need to add our custom_css.css here.
core/includes/template/scripts.php //Here we're going to add the javascript for the slider
In addition you need to download the following javascript slider
Take the "responsiveslides.min.js" and move it to core/assets/js
Take the "responsiveslides.css" and move it to core/assets/css
Open your index.tpl file in your editor. I use notepad++ but you can use whatever you like.
Let's take a look at the part we want to change.
<div class="jumbotron jumbotron-homepage"> <h1>{$SITENAME}</h1> <p>{$PLAYERS_ONLINE}</p> <p>{$CONNECT_WITH}</p> </div>
We can see the diffrent placeholders for our dynamic content. As we want to remove this part, we can add coments or delete the tags inside the
<div class="jumbotron jumbotron-homepage"> <!-- <h1>{$SITENAME}</h1> <p>{$PLAYERS_ONLINE}</p> <p>{$CONNECT_WITH}</p> --> </div>
In the next part we are going to add the content which will 'slide'.
In my case this content will be two pictures. But you can add whatever you want to slide as simple HTML.
We define an unordered-list Element which will hold our list of content. This element will have the class 'slide'.
<div class="jumbotron jumbotron-homepage"> <!-- <h1>{$SITENAME}</h1> <p>{$PLAYERS_ONLINE}</p> <p>{$CONNECT_WITH}</p>--> <ul class="slide"> <li> <img src="core/assets/img/welcome-banner.png" alt=""></li> <li><img src="core/assets/img/vote-banner.png" alt=""></li> </ul> </div>
Thats all we had to change in our index.tpl file. Now we want to style it cause it looks kinda *** without styling.
Open the custom_css.css file or create it if you havn't done yet. We need to define some rules for our outer container (jumbotron)
Add the following to your custom_css.css file. You can modify it to your likes.
.jumbotron { background-color: rgba(0, 0, 0, 0.5); /*Make semi-transparent background. Set the last value to 0 if you want complete transparency.*/ background-image: none !IMPORTANT; /*Remove the background-image*/ border: none; /*Remove the border*/ box-shadow: none; /*Remove the box-shadow*/ padding: 0px; /*Remove the padding*/ border-radius: 0px; /*Remove the border-radius*/ margin-bottom: 20px !IMPORTANT; /*Create a margin at the bottom*/}
Now that we created some css we want to add it to our site, so that we can see it.
Open the header.php file. And look-out for the //Global tag. Then add the following line underneath the other css files.
In addition we can add the css file for our slider which we added at the beginning.
It should look like this.
// Global echo '<link href="' . PATH . 'core/assets/css/toastr.css" rel="stylesheet">' . PHP_EOL; echo '<link href="' . PATH . 'core/assets/css/custom_core.css" rel="stylesheet">' . PHP_EOL; echo '<link href="' . PATH . 'core/assets/css/custom_css.css" rel="stylesheet">' . PHP_EOL; echo '<link href="' . PATH . 'core/assets/css/responsiveslides.css" rel="stylesheet">' . PHP_EOL; echo '<link rel="icon" href="' . PATH . 'core/assets/favicon.ico">';
Now you should see some changes when you visit your site.
To activate the slide we need to add the Javascript file which we added at the beginning.
Open the scripts.php file and add
echo '<script src="' . PATH . 'core/assets/js/responsiveslides.min.js"></script> '. PHP_EOL;
underneath the other scripts.
It should look like this.
/* * Load scripts */echo '<script src="' . PATH . 'core/assets/js/jquery.min.js"></script>' . PHP_EOL;echo '<script src="' . PATH . 'styles/themes/' . $theme_result . '/js/bootstrap.min.js"></script>' . PHP_EOL;echo '<script src="' . PATH . 'core/assets/js/jquery.cookie.js"></script>' . PHP_EOL;echo '<script src="' . PATH . 'core/assets/js/toastr.js"></script>' . PHP_EOL;echo '<script src="' . PATH . 'core/assets/js/responsiveslides.min.js"></script> '. PHP_EOL;
We are close to the end. But there are still few things to do. We need to call the Javascript. We do this by adding a small script at the end of the scripts.php file.
<script> $(function() { $(".slide").responsiveSlides({ auto: true, // Boolean: Animate automatically, true or false speed: 1500, // Integer: Speed of the transition, in milliseconds timeout: 8000, // Integer: Time between slide transitions, in milliseconds pause: true, // Boolean: Pause on hover, true or fals }); }); </script>
If you have done everything righ, you should have a nice slider.
If you have questions or problems just ask 
I hope you enjoyed this tutorial. I plan on making more if you like it and please give some feetback as this was my first tutorial ever 
EDIT I AM SORRY FOR THE UGLY CODE SNIPPETS...THEY GET MESSED UP WHEN I SAVE THEM :/

Hmm hmm, it doesnt work for me :) I am sure i placed everything at place. And i used also two images. All i know javascript doesn't work. And i am noob when it comes to javascript... Are you sure there's no mistakes left in this tutorial? Peace.
badbojus said:Hmm hmm, it doesnt work for me :) I am sure i placed everything at place. And i used also two images. All i know javascript doesn't work. And i am noob when it comes to javascript... Are you sure there's no mistakes left in this tutorial? Peace.
Sorry if my post seem a bit off topic, but you realized that this tutorial was made 4 months ago? The code might not be working for the newer version of NamelessMC (but I'm not sure)
_Pear said:badbojus said:Hmm hmm, it doesnt work for me :) I am sure i placed everything at place. And i used also two images. All i know javascript doesn't work. And i am noob when it comes to javascript... Are you sure there's no mistakes left in this tutorial? Peace.
Sorry if my post seem a bit off topic, but you realized that this tutorial was made 4 months ago? The code might not be working for the newer version of NamelessMC (but I'm not sure)
The code you need edit/replace in nameless have not changed. And i see that topic was posted 4 months ago. :)
 4
4